Update: We have recently optimized the SPM setup on CoreOS and integrated a logging gateway to Logsene into the SPM Agent for Docker. Please follow the setup instructions in Centralized Log Management and Monitoring for CoreOS Clusters
[ Note: Click here for the Docker Monitoring webinar video recording and slides. And click here for the Docker Logging webinar video recording and slides. ]
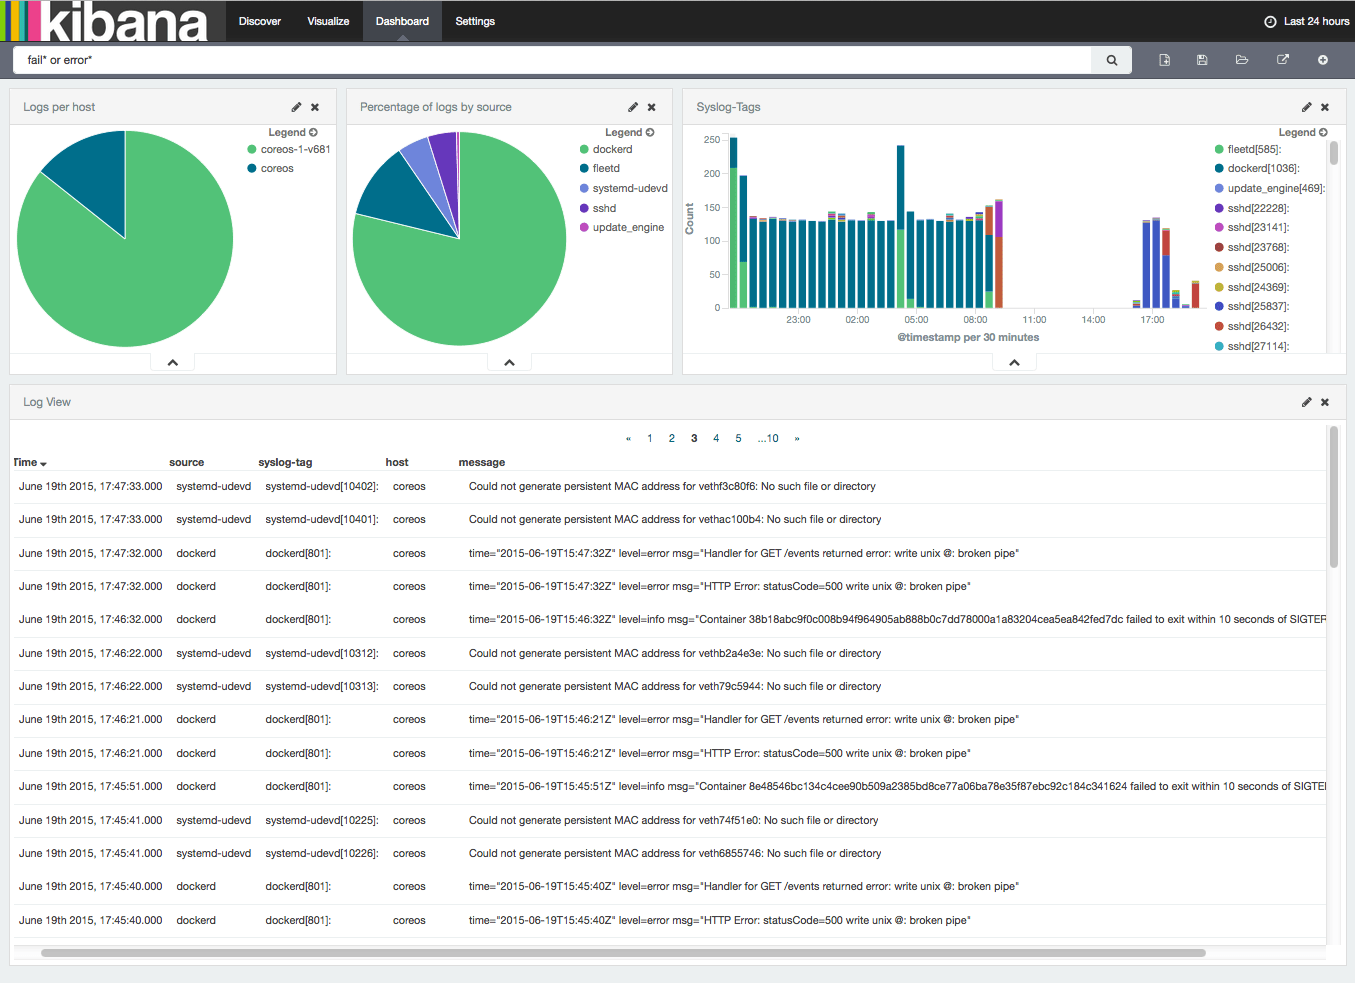
CoreOS Linux is the operating system for “Super Massive Deployments”. We wanted to see how easily we can get CoreOS logs into Elasticsearch / ELK-powered centralized logging service. Here’s how to get your CoreOS logs into ELK in about 5 minutes, give or take. If you’re familiar with CoreOS and Logsene, you can grab CoreOS/Logsene config files from Github. Here’s an example Kibana Dashboard you can get in the end:

CoreOS is based on the following:
- Docker and rkt for containers
- systemd for startup scripts, and restarting services automatically
- etcd as centralized configuration key/value store
- fleetd to distribute services over all machines in the cluster. Yum.
- journald to manage logs. Another yum.
Amazingly, with CoreOS managing a cluster feels a lot like managing a single machine! We’ve come a long way since ENIAC!
There’s one thing people notice when working with CoreOS – the repetitive inspection of local or remote logs using “journalctl -M machine-N -f | grep something“. It’s great to have easy access to logs from all machines in the cluster, but … grep? Really? Could this be done better? Of course, it’s 2015!
Here is a quick example that shows how to centralize logging with CoreOS with just a few commands. The idea is to forward the output of “journalctl -o short” to Logsene‘s Syslog Receiver and take advantage of all its functionality – log searching, alerting, anomaly detection, integrated Kibana, even correlation of logs with Docker performance metrics — hey, why not, it’s all available right there, so we may as well make use of it all! Let’s get started!
Preparation:
1) Get a list of IP addresses of your CoreOS machines
fleetctl list-machines
2) Create a new Logsene App (here)
3) Change the Logsene App Settings, and authorize the CoreOS host IP Addresses from step 1) (here’s how/where)
Congratulations – you just made it possible for your CoreOS machines to ship their logs to your new Logsene app!
Test it by running the following on any of your CoreOS machines:
journalctl -o short -f | ncat --ssl logsene-receiver-syslog.sematext.com 10514
…and check if the logs arrive in Logsene (here). If they don’t, yell at us @sematext – there’s nothing better than public shaming on Twitter to get us to fix things. 🙂
Create a fleet unit file called logsene.service
[Unit]
Description=Logsene Log Forwarder

[Service]
Restart=always
RestartSec=10s
ExecStartPre=/bin/sh -c "if [ -n "$(etcdctl get /sematext.com/logsene/`hostname`/lastlog)" ]; then  echo "Value Exists: /sematext.com/logsene/`hostname`/lastlog $(etcdctl get /sematext.com/logsene/`hostname`/lastlog)"; else etcdctl set /sematext.com/logsene/`hostname`/lastlog"`date +"%Y-%%m-%d %%H:%M:%S"`"; true; fi"
ExecStart=/bin/sh -c "journalctl --since "$(etcdctl get /sematext.com/logsene/`hostname`/lastlog)" -o short -f | ncat --ssl logsene-receiver-syslog.sematext.com  10514"
ExecStopPost=/bin/sh -c "export D="`date +"%Y-%%m-%%d %%H:%M:%S"`"; /bin/etcdctl set /sematext.com/logsene/$(hostname)/lastlog "$D""

[Install]
WantedBy=multi-user.target

[X-Fleet]
Global=true
Activate cluster-wide logging to Logsene with fleet
To start logging to Logsene from all machines activate logsene.service:
fleetctl load logsene.service
fleetctl start logsene.service
There. That’s all there is to it! Hope this worked for you!
At this point all your CoreOS logs should be going to Logsene. Now you have a central place to see all your CoreOS logs. If you want to send your app logs to Logsene, you can do that, too — anything that can send logs via Syslog or to Elasticsearch can also ship logs to Logsene. If you want some Docker containers & host monitoring to go with your CoreOS logs, just pull sematext-agent-docker from Docker Registry. Enjoy!