Windows
Sematext Agent collects a plethora of metrics about Windows hosts (CPU, memory, disk, network, processes) as well as Windows Events. The installer is responsible for installing the Sematext Agent, configuring it, and starting it as a Windows Service.
Installation can be done either by using the GUI installer or through the command line.
Preconditions
Before starting, please check the platform support policy page to make sure your Windows platform is supported.
To see your Windows host metrics in Sematext Cloud, you need to create an Infra App and select the Windows environment. This will provide you with an Infra App token, which is essential for establishing a secure link between Sematext Cloud and Sematext Agent.
Install from GUI
- Download the Sematext Agent installer
- Follow the installation steps and accept the license agreement
- Set the Infra App token
- Select a region (EU or US) based on where you created your account in Sematext Cloud
- Set the Logs App token
- This is optional. If you want to ship your Windows Logs, set your Logs App token. You can find this token under your Windows Logs App's Agent Installation page. If left blank, Windows Logs collection won't be activated.
After completing these steps, Sematext Agent will be automatically started as a Windows Service.
Install from command line
Download the Sematext Agent installer.
Using PowerShell
Run the following command as Administrator from the folder where you downloaded the installer:
Start-Process -Wait msiexec -ArgumentList "/qn /i $($msiFileName = 'AGENT_MSI_INSTALLER'; $msiFileName) /L*V `"$msiFileName.log`" INFRA_APP_TOKEN=YOUR_INFRA_APP_TOKEN REGION=YOUR_REGION_EU_or_US"
If you want to ship your Windows logs, be sure to also set your Logs App token. You can find this token on your Windows Logs App's Agent Installation page.
Start-Process -Wait msiexec -ArgumentList "/qn /i $($msiFileName = 'sematext-agent-latest.msi'; $msiFileName) /L*V `"$msiFileName.log`" INFRA_TOKEN=YOUR_INFRA_APP_TOKEN REGION=YOUR_REGION_EU_or_US LOGS_TOKEN=YOUR_LOGS_APP_TOKEN"
Where:
YOUR_INFRA_APP_TOKEN: the Infra App tokenYOUR_LOGS_APP_TOKEN: the Logs App tokenYOUR_REGION_EU_or_US: your Sematext Cloud region - EU or USAGENT_MSI_INSTALLER: the filename of the Sematext Agent Windows installer
For example:
Start-Process -Wait msiexec -ArgumentList "/qn /i $($msiFileName = 'sematext-agent-latest.msi'; $msiFileName) /L*V `"$msiFileName.log`" INFRA_APP_TOKEN=7511db7f-c060-4e10-b667-5f2653d4933e REGION=EU LOGS_TOKEN=7611db7f-c060-4e10-b667-5f2653d4966b"
Using Windows CMD
Run the following command as Administrator from the folder where you downloaded the installer:
start /wait msiexec /qn /i "AGENT_MSI_INSTALLER" /L*V "AGENT_MSI_INSTALLER.log" INFRA_TOKEN=YOUR_INFRA_APP_TOKEN REGION=YOUR_REGION_EU_or_US
If you want to ship your Windows logs, be sure to also set your Logs App token. You can find this token on your Windows Logs App's Agent Installation page.
start /wait msiexec /qn /i "AGENT_MSI_INSTALLER" /L*V "AGENT_MSI_INSTALLER.log" INFRA_TOKEN=YOUR_INFRA_APP_TOKEN REGION=YOUR_REGION_EU_or_US LOGS_TOKEN=YOUR_LOGS_APP_TOKEN
Where:
YOUR_INFRA_APP_TOKEN: the Infra App tokenYOUR_LOGS_APP_TOKEN: the Logs App tokenYOUR_REGION_EU_or_US: your Sematext Cloud region - EU or USAGENT_MSI_INSTALLER: the filename of the Sematext Agent Windows installer
For example:
start /wait msiexec /qn /i "sematext-agent-latest.msi" /L*V "sematext-agent-latest.msi.log" INFRA_APP_TOKEN=7511db7f-c060-4e10-b667-5f2653d4933e REGION=EU LOGS_TOKEN=7611db7f-c060-4e10-b667-5f2653d4966b
After completing these steps, Sematext Agent will be automatically started as a Windows Service.
Deploying using Group Policy
These steps will walk you through deploying the Sematext Agent using Group Policy on a Windows Server environment. Deploying software via Group Policy allows for automated, consistent and scalable deployments across multiple machines.
Preparation
-
Download the installer
Download the Sematext Agent installer
-
Create a deployment script
Create a PowerShell script (
install_sematext_agent.ps1) with the following content:Start-Process -Wait msiexec -ArgumentList "/qn /i $($msiFileName = 'sematext-agent-latest.msi'; $msiFileName) /L*V `"$msiFileName.log`" INFRA_APP_TOKEN=YOUR_INFRA_APP_TOKEN REGION=YOUR_REGION_EU_or_US"For including logs collection, use:
Start-Process -Wait msiexec -ArgumentList "/qn /i $($msiFileName = 'sematext-agent-latest.msi'; $msiFileName) /L*V `"$msiFileName.log`" INFRA_APP_TOKEN=YOUR_INFRA_APP_TOKEN REGION=YOUR_REGION_EU_or_US LOGS_TOKEN=YOUR_LOGS_APP_TOKEN"Make sure to replace
YOUR_INFRA_APP_TOKENwith your actual Infra App token,YOUR_REGION_EU_or_USwith eitherEUorUSdepending on your Sematext Cloud region, andYOUR_LOGS_APP_TOKENwith your Logs App token if applicable. -
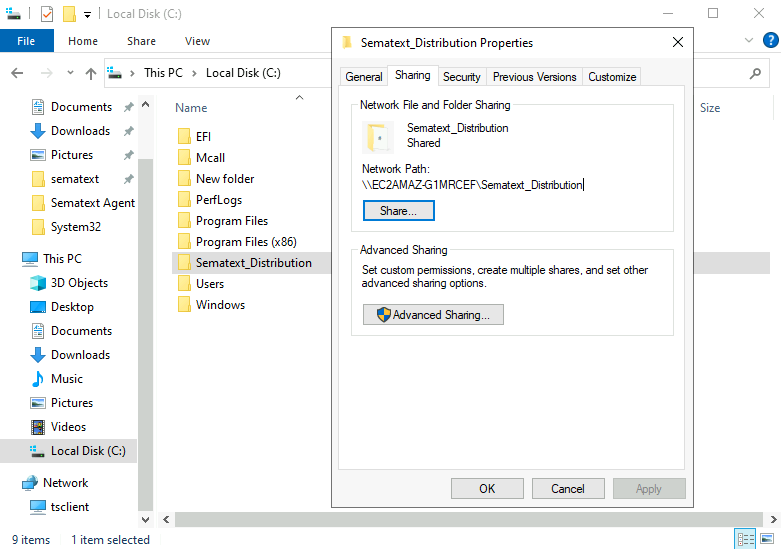
Create a shared network folder
- Create a shared folder on your server (e.g.,
\\ServerName\Sematext_Distribution) - Place both the PowerShell script and MSI installer in this shared folder
- Set permissions on the shared folder to ensure all target computers have read access
- Create a shared folder on your server (e.g.,
Active Directory Configuration
-
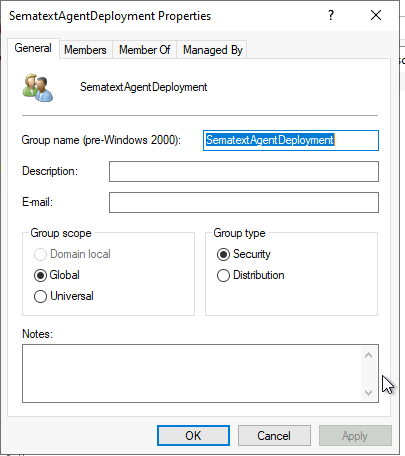
Create a new security group
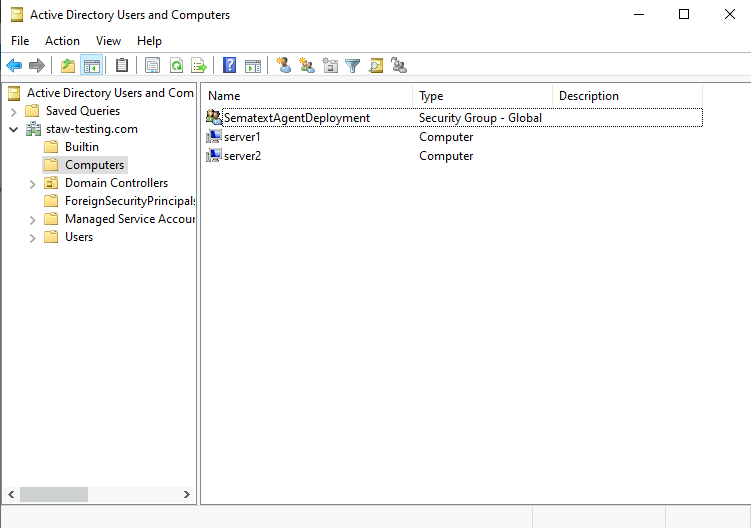
- Open the Active Directory Users and Computers console on your server
- Under the domain, right-click on Computers, select New > Group
- Name the group (e.g.,
SematextAgentDeployment) - Make sure the Group scope is set to Global and Group type is set to Security
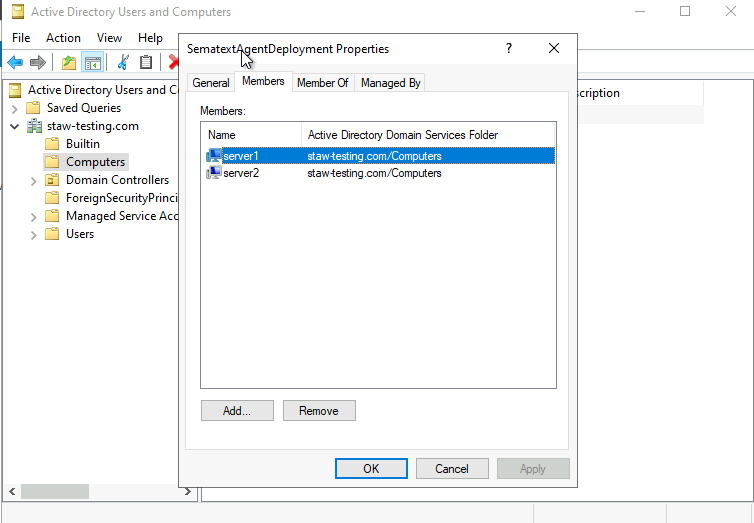
- Add computers to the group:
- Right-click the newly created group, select Properties
- Go to the Members tab and click Add
- Enter the names of the computers you want to deploy the Sematext Agent to
- Click Check Names to validate they are recognized by Active Directory
- Click OK
-
Create a new Group Policy Object (GPO)
- Open the Group Policy Management Console (GPMC) by typing
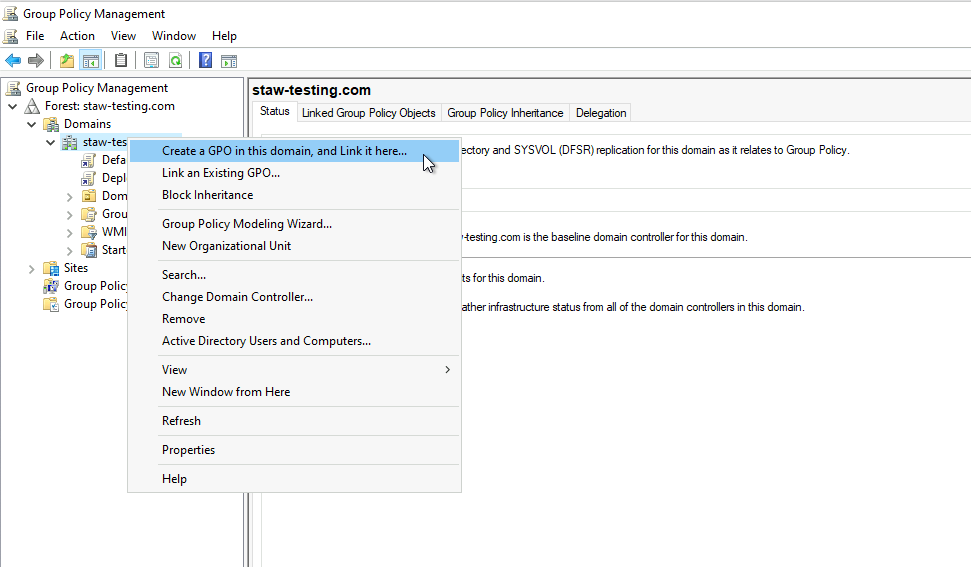
gpmc.mscin the Run dialog (Win + R) - In the Group Policy Management Console, right-click on the domain where your client computers reside
- Select Create a GPO in this domain, and Link it here…
- Name the GPO something descriptive like
Deploy Sematext Agent
- Open the Group Policy Management Console (GPMC) by typing
-
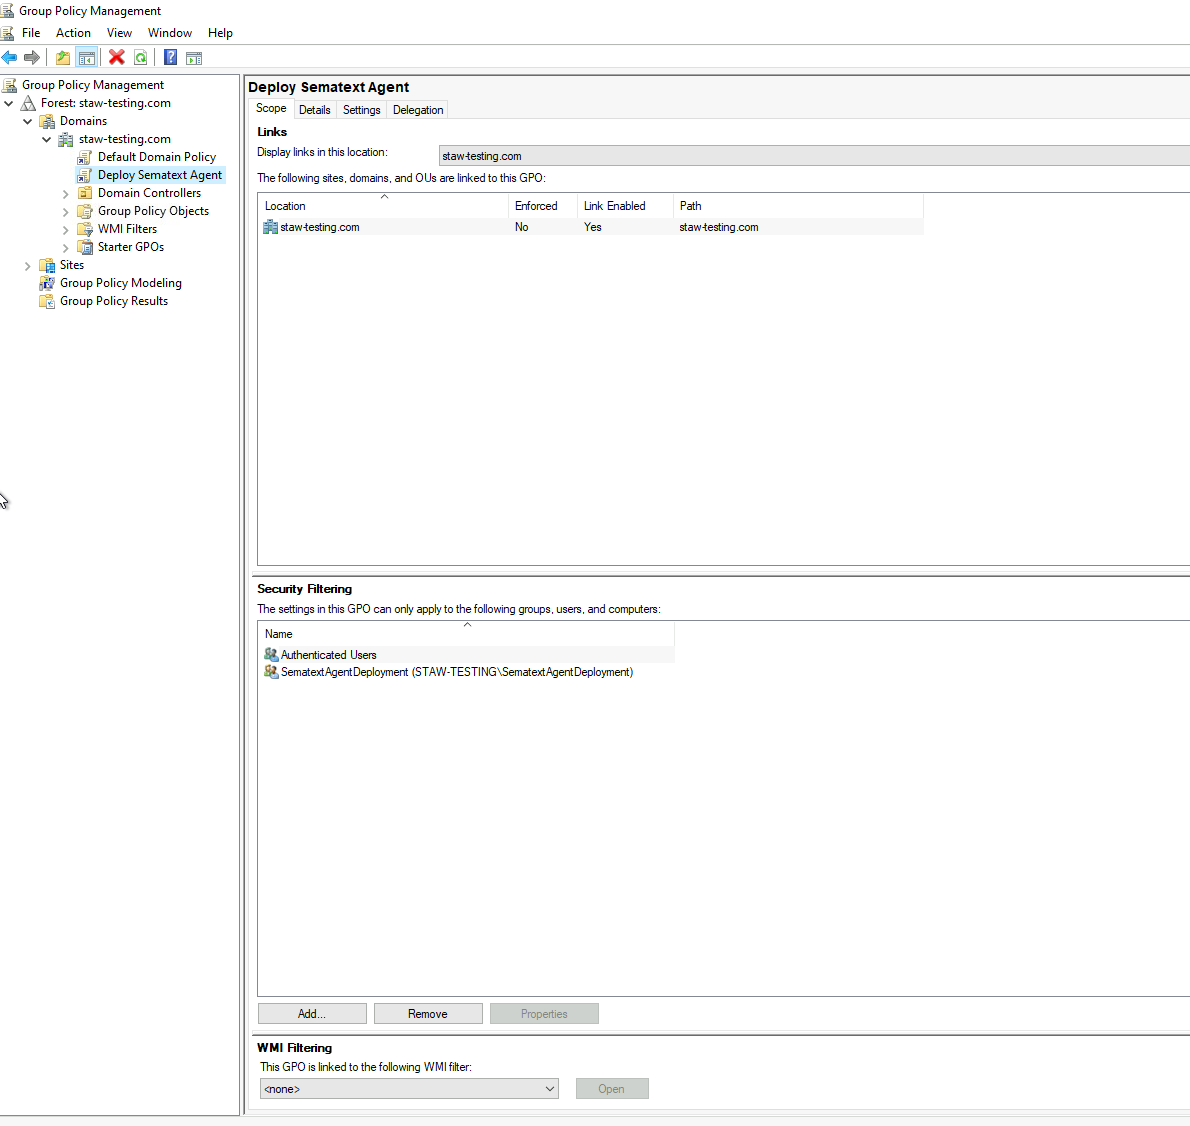
Configure GPO security filtering
- Select the newly created GPO in the tree
- Under the Security Filtering section, click Add
- Enter the name of the group you created (e.g.,
SematextAgentDeployment) - Click Check Names, and then click OK
-
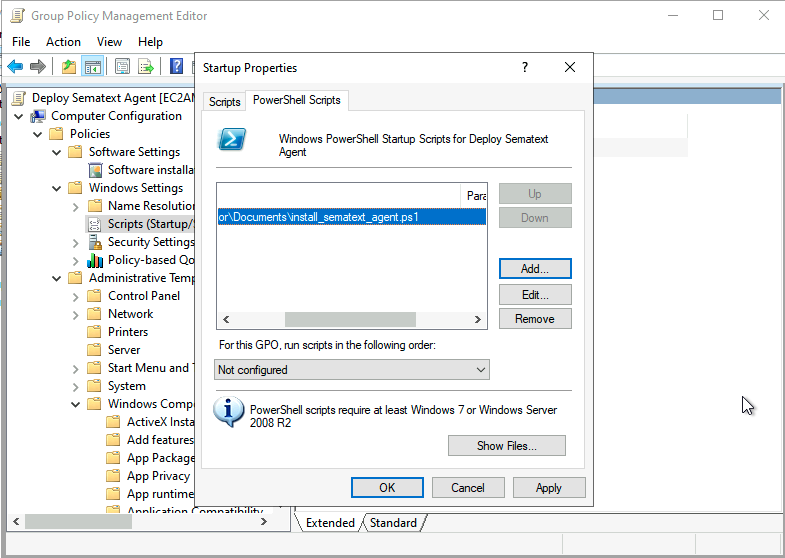
Configure the GPO to run the script
- Right-click the newly created GPO and select Edit
- In the Group Policy Management Editor, navigate to: Computer Configuration > Policies > Windows Settings > Scripts (Startup/Shutdown)
- Double-click on Startup, select the PowerShell Scripts tab
- Click Add...
- In the Add a Script dialog, click Browse... and navigate to the shared folder
- Select
install_sematext_agent.ps1
-
Configure PowerShell execution policy
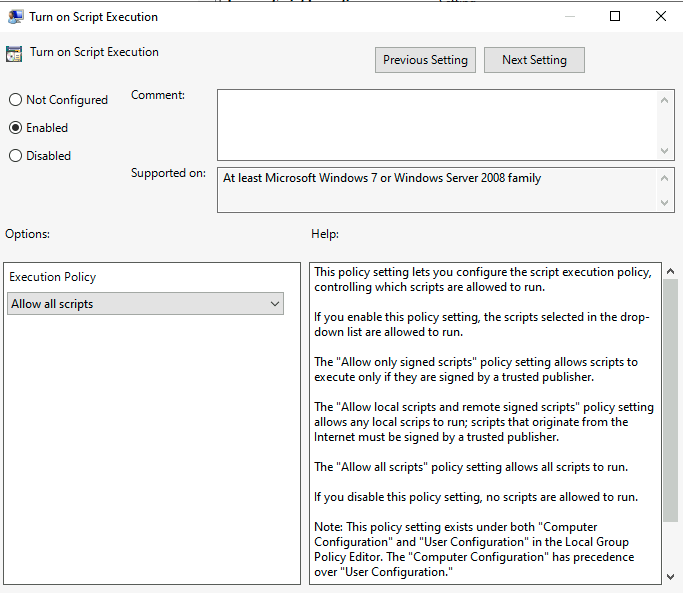
- In the Group Policy Management Editor, navigate to: Computer Configuration > Policies > Administrative Templates > Windows Components > Windows PowerShell
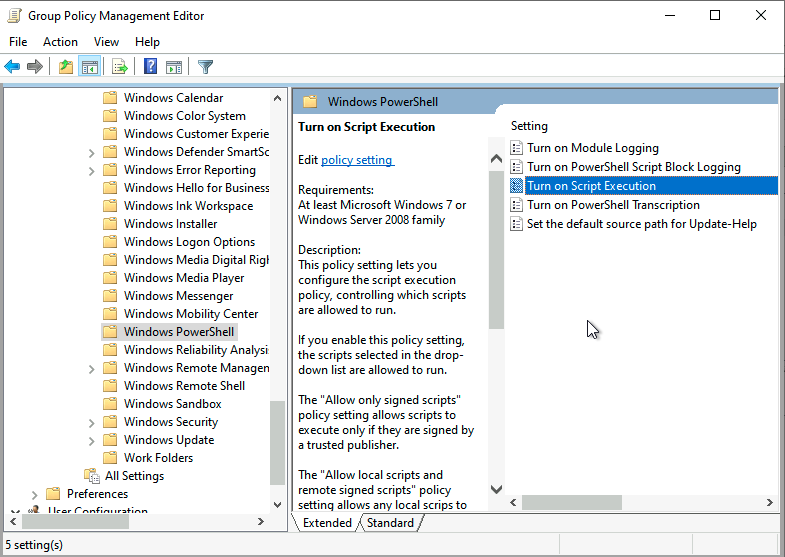
- Enable the policy Turn on Script Execution and set it to Allow all scripts
Client-Side Configuration and Verification
-
Force Group Policy update
- On a client machine, open Command Prompt with administrative privileges
- Run the following command to force a Group Policy update:
-
Verify installation
- After the Group Policy update, restart the client machine
- Log in and verify that the Sematext Agent has been installed and started as a Windows Service
Troubleshooting Tips
If the deployment is unsuccessful, check the following:
-
Check Network Access
- Verify the client machines can access the shared folder by browsing to the network path (e.g.,
\\ServerName\Sematext_Distribution) from a client machine
- Verify the client machines can access the shared folder by browsing to the network path (e.g.,
-
Review Event Logs
- On the client machine, check the Event Viewer under: Applications and Services Logs > Microsoft > Windows > GroupPolicy
- Look for any errors related to software installation
-
Check GPO Application
- Confirm the GPO is correctly applied to the client machine by running:
- This command shows which Group Policies are applied to the machine
-
Review GPO Settings
- Validate the GPO settings in the Group Policy Management Editor
- Ensure the deployment is configured correctly
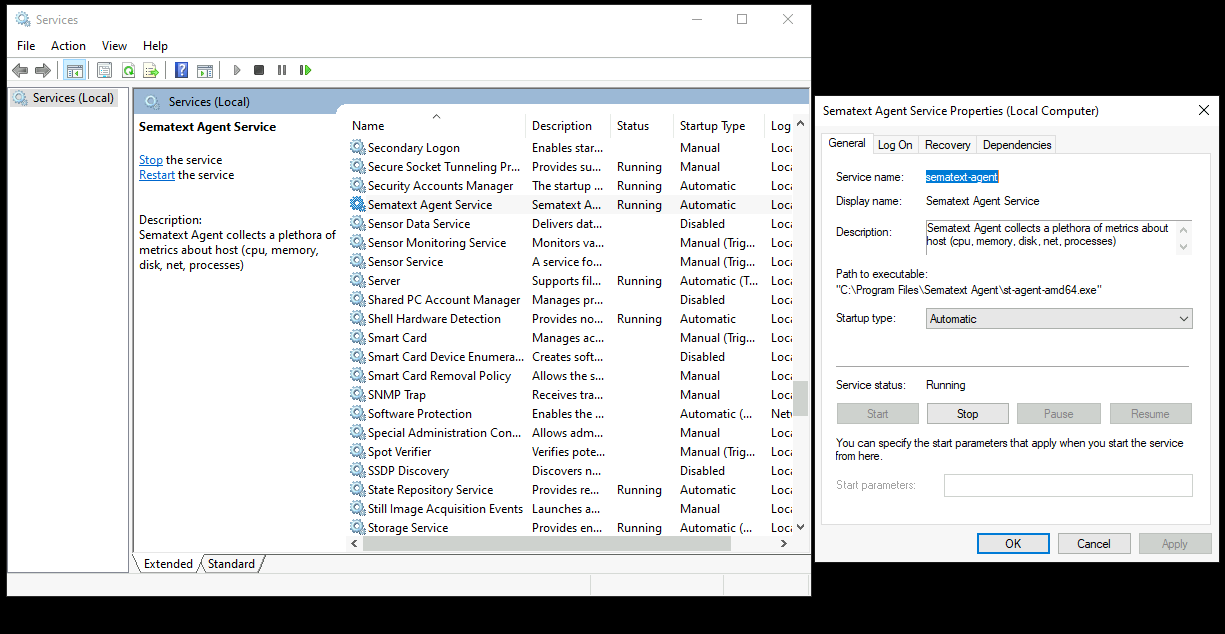
How to check the Sematext Agent service status
Windows Services
Open Windows Services and find the Sematext Agent service:
Command line
Run the following command:
How to start / stop / restart Sematext Agent
To start, stop or restart the Sematext Agent, you can perform these actions through the GUI:
- Start: Open the Windows Services application by searching for "Services" in the Windows search bar, locate "Sematext Agent" in the list of services, right-click on it, and select "Start"
- Stop: Similarly, in the Services application, locate "Sematext Agent", right-click on it, and select "Stop"
- Restart: To restart the Sematext Agent, you can either stop and then start it again using the aforementioned steps or right-click on "Sematext Agent" in the Services application and select "Restart"
Alternatively, you can use the command-line interface by running one of the following commands as Administrator:
Start:
Stop:
Restart:
How to check Sematext Agent logs
Sematext Agent logs are located in the C:\Windows\System32\config\systemprofile\AppData\Local\sematext-agent folder.
For example, you can access the logs file like below;
cd C:\Windows\System32\config\systemprofile\AppData\Local\sematext-agent

notepad.exe .\logs\st-agent.log
How to change App tokens or region
You can either reinstall Sematext Agent through GUI or by running the following command from command line:
cd  'C:\Program Files\Sematext Agent\'
st-agent-amd64.exe windows-config set-token -t "YOUR_INFRA_TOKEN"
st-agent-amd64.exe windows-config set-logs-token -t "YOUR_LOGS_TOKEN"
st-agent-amd64.exe windows-config set-region -r "EU/US"
After the changes, you need to restart the agent:
How to unistall Sematext Agent
You can uninstall Sematext Agent using the GUI installer or from Windows Settings > Apps.
To completely remove all configuration files and logs, execute the following commands to delete the specified directories:
- Delete logs and journals:
- Delete properties and helper files:
Limitations / Known Issues
The Sematext Agent for Windows is still a work in progress and has some limitations:
- Discovery and configuration of services and log sources are not yet supported
- Inventory functionality is not yet available
- Custom tags cannot be created