Saved Views
Filtering and grouping data is a central part of the Sematext Cloud user interface. With Saved Views you can save your filters and groups for faster access later. If you find yourself often applying the same filters on your data then this feature can be a time saver.
Saved Views feauture is available in Monitoring, Logs, Synthetics, and Experience Apps as well as on any dashboards you've created.
When are Saved Views Useful
Sematext has a concept of Apps, which act as distinct buckets of data and additionally allow you to:
- apply different plans or different data retentions to different Apps and thus have flexibility around costs
- invite others to individual Apps and thus control who can see which data
Having multiple, distinct Apps is great when you have:
- multiple, independent environments - if you have two production environemnts you would likely want to create two separate Infra Apps
- multiple, independent clusters - if, for example, you have two Elasticsearch clusters serving two different applications you would likely create two separate Elasticsearch Monitoring Apps
- ...
However, nothing stops you from having data from multiple environments or clusters in the same App. If you choose to do that you might still want the ability to see performance charts, log events, etc. for one specific environment or one specific cluster. This is where Saved Views are handy.
Saved Views and Tags
The above few examples are not exhaustive. For example, even in a single environment there will be nodes that serve a different purpose, have a different role. You may have database servers, web servers, Elasticsearch nodes, application nodes, etc. all sending their metrics to the same App. But you may want to view their each of their performance metrics separately, not just in aggregate. To see their metrics separately you would select filters that show only your database servers and you would save that view. Then you would select filters that show only your web servers and you would save that as another view. And so on. Thus, if you have a single environment or cluster the Saved Views functionality can be helpful.
Q: But how do you select only your database servers? How do you select only your web servers?
A: By using tags!
Saved Views let you save your filters and groups for faster access later. Values you see in filters and groups in Sematext are tags.
Q: But where do these tags come from?
A: They come from the Sematext Agent. There are 2 types of tags:
- Default tags that Sematext Agent collects and ships. For example, the hostname is shipped in a tag called
os.host, as can be seen in the Sematext Common Schema. - Custom tags that you define in the Sematext Agent's configuration file.
This second option is what you want to use -- even if you don't use Saved Views -- to be able to filter and group better.
When deploying Sematext Agent to your database servers you would deploy it with the configuration file that includes a tag such as role:database, while Sematext Agents installed on your web servers would have a configuration with role:web tag.
Once configured like this, tags are sent by the Sematext Agent as part of every data point or log event and they are shown in UI as filters. When you select the role:database from the filter you will see only data for your database servers, and when you select role:web you will see only your web servers' metrics. With a setup like this you can save views to see database and web servers's metrics separately and, because your views are based on custom tags and not hard-coded to specific hostname via os.host tag, your views will automatically include or exclude any new or removed hosts as your infrastructure changes without requiring you to update your filters/views.
While we used monitoring and performance metrics in the above example, the same logic applies to all other data in Sematext where filtering is available.
Read tags docs to undertand why tags are useful, their benefits beyond filtering, common ways to use tags, and how to define your own tags that make sense for your monitoring.
Saving Views
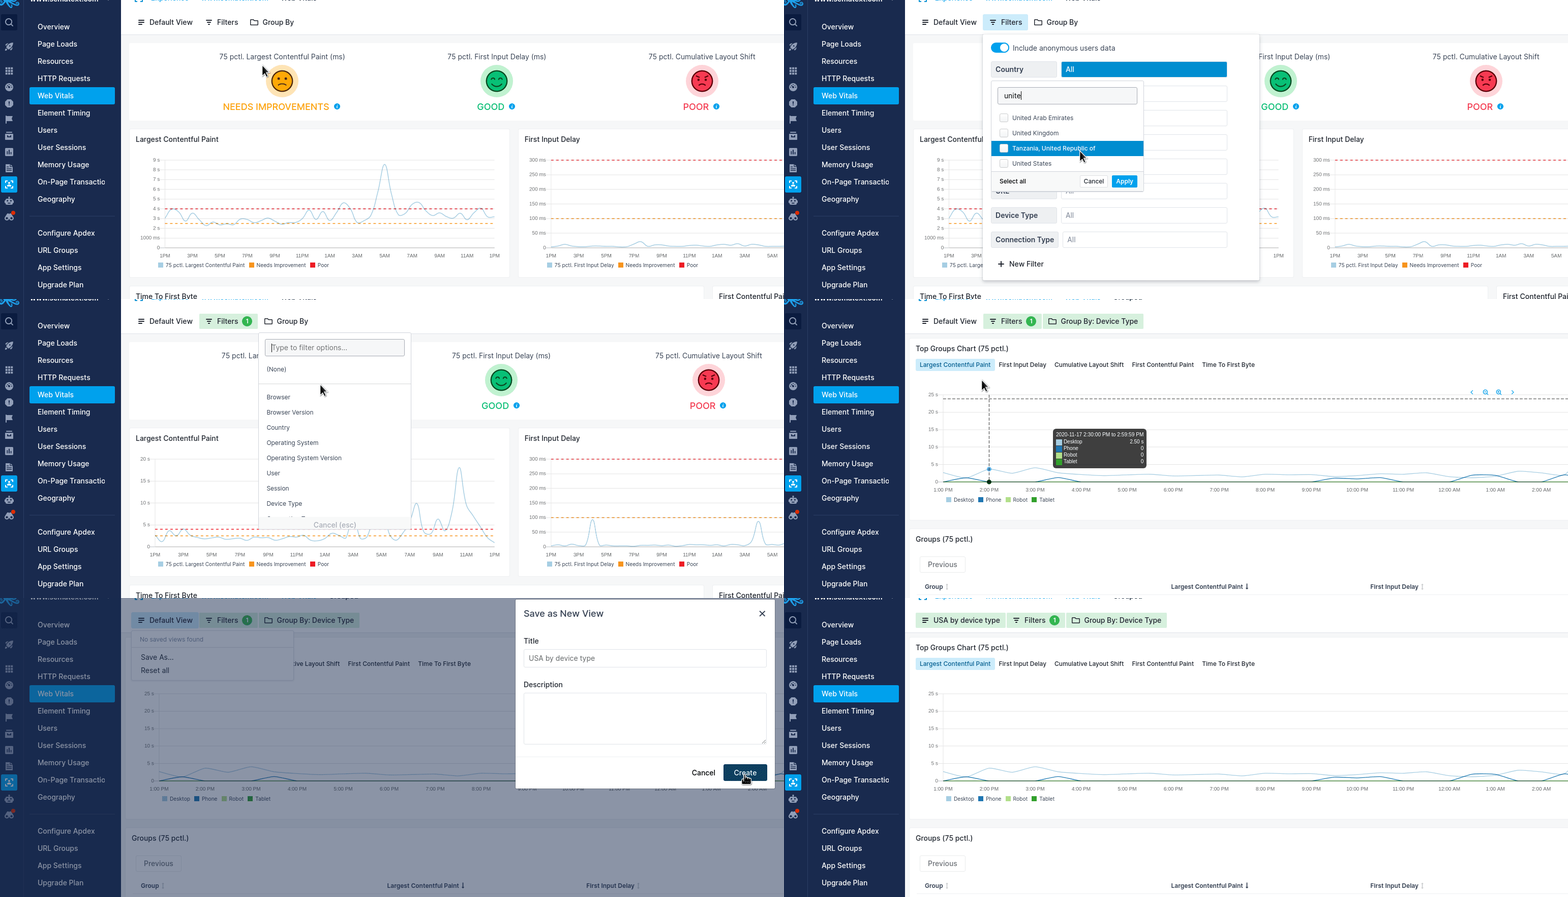
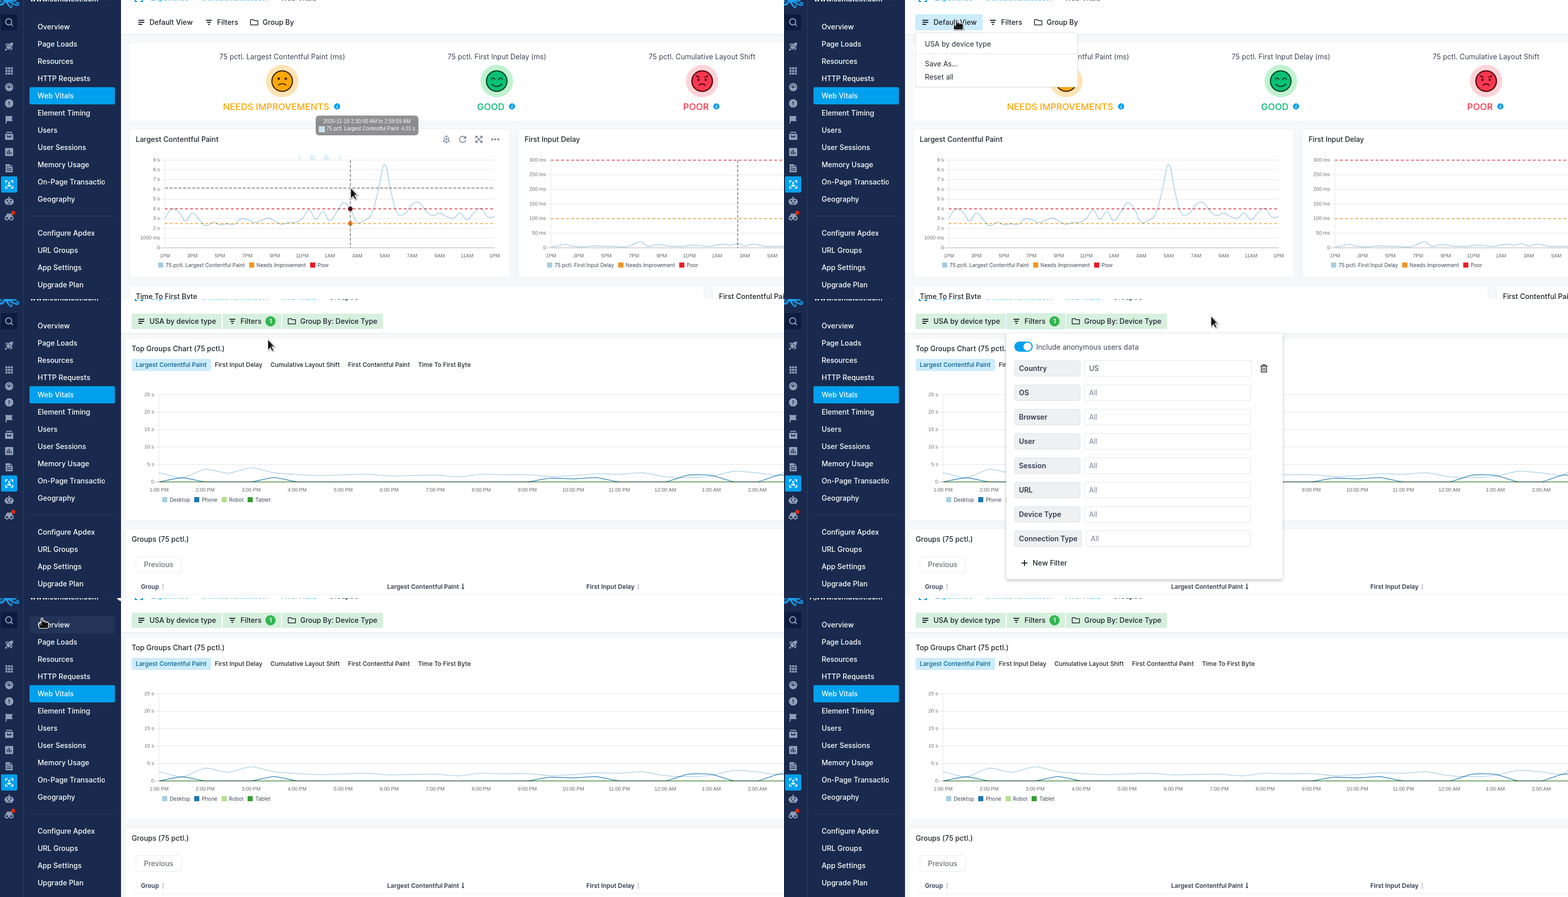
The Saved Views functionality is available on all screens where the Saved Views button is visible. This button displays Default View when no saved view is selected as shown in the animations below.
To save a view for later, follow the steps below:
- Change the filters according to which data you want to see
- Click on the highlighted Saved Views button
- Click on "Save As" and enter a descriptive name for the filter

Using Saved Views
Later, when you come back to this screen:
- Click the Saved Views button
- Select the previously saved view
