GitHub Webhook Events
By configuring the GitHub Webhooks to point to Sematext you can store information about Github repository commits, opened or closed PRs, PR comments, etc. in one place. This provides insight into the entire GitHub workflow for your team. Github Webooks can be configured at the level of individual repositories and/or organization. By configuring the Github Webhooks at the organization level you can quickly and easily have events for all repositories sent to Sematext.
Here is just one of several out of the box Sematext dashboards this integration provides:

The Github integration comes with several pre-built dashboards that provide valuable insight about your team's development velocity, as we as information about individual contributors. As you can see on the left side of this screenshot, there are other dashboards that this integration provides out of the box.
This integration provides insights into your organization's team pulse, development patterns, metrics, development velocity, progress, trends, etc. It lets you spot opportunities for improvement in the daily workflow of your team.
GitHub Webhook Events Quick Start
The Sematext GitHub Webhook Events Integration supports the following events:
- Commit comments
- Branch or tag creation
- Branch or tag deletion
- Issues
- Issue comments
- Pull requests
- Pull request reviews
- Pull request review comments
- Pushes
- Releases
When one of these events is triggered, GitHub sends an HTTP POST payload to the Webhook's configured URL. You can configure a Webhook to send events to Sematext either through the Github UI or with their API.
Set Up A GitHub Webhook In The GitHub UI
Open the Organization or Repository settings, navigate to Webhooks and click the Add webhook button.
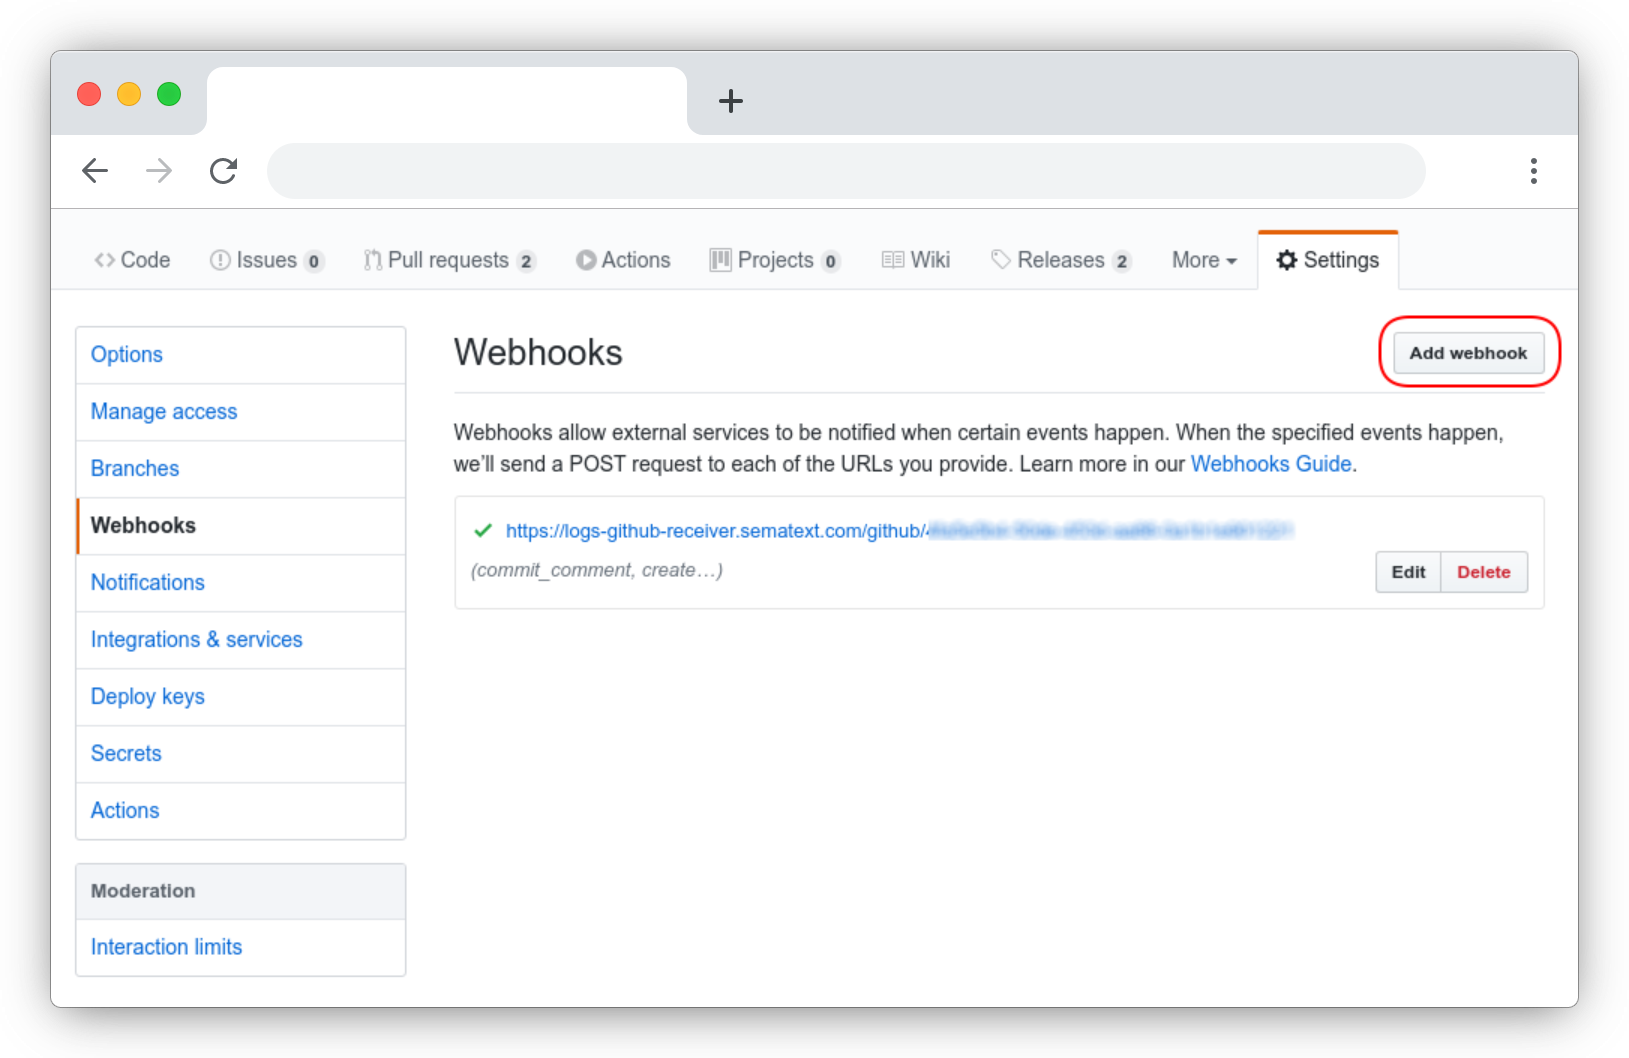
Add the Payload URL.
https://logs-github-receiver.sematext.com/github/<LOGS_TOKEN>

# Or for EU
https://logs-github-receiver.eu.sematext.com/github/<LOGS_TOKEN>

Check the supported Events and Save the Webhook.

Save the Webhook.
Set Up A GitHub Webhook Using The GitHub API
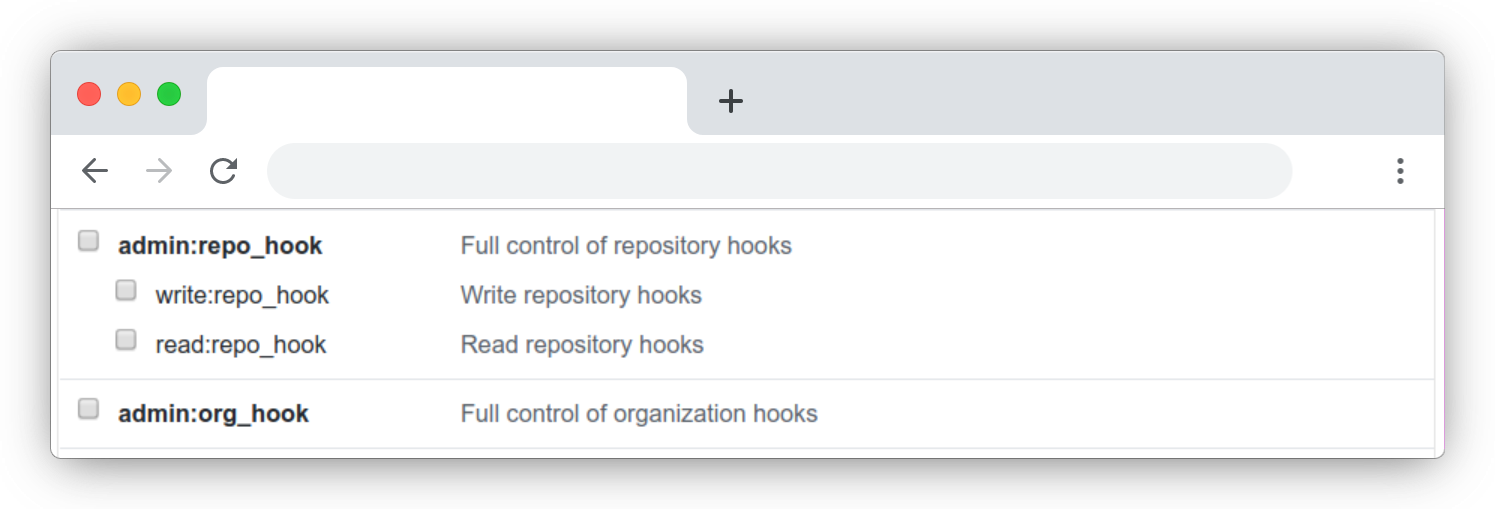
First create a new API token. Open the Personal Access tokens settings in your GitHub account. It should be here. Click Generate new token. The only permissions you need are related to hooks.
Finish creating the token and save it somewhere safe. You will need it in the next step.
Now you need to create a webhook. Using cURL you can now create a new Webhook in any Organization or Repository you have access to.
Organization
curl -X POST \
  https://api.github.com/orgs/<ORGANIZATION_NAME>/hooks \
  -H 'authorization: token <YOUR_API_TOKEN>' \
  -H 'cache-control: no-cache' \
  -d '{
  "config": {
    "url": "https://logs-github-receiver.sematext.com/github/<LOGS_TOKEN>"
    # for EU "url": "https://logs-github-receiver.eu.sematext.com/github/<LOGS_TOKEN>"
  },
  "events": [
    "issues",
    "issue_comment",
    "pull_request",
    "pull_request_review",
    "pull_request_review_comment",
    "commit_comment",
    "push",
    "release",
    "create",
    "delete"
  ]
}'
Repository
curl -X POST \
  https://api.github.com/repos/<GITHUB_USERNAME>/<REPOSITORY_NAME>/hooks \
  -H 'authorization: token <YOUR_API_TOKEN>' \
  -H 'cache-control: no-cache' \
  -d '{
  "config": {
    "url": "https://logs-github-receiver.sematext.com/github/<LOGS_TOKEN>"
    # for EU "url": "https://logs-github-receiver.eu.sematext.com/github/<LOGS_TOKEN>"
  },
  "events": [
    "issues",
    "issue_comment",
    "pull_request",
    "pull_request_review",
    "pull_request_review_comment",
    "commit_comment",
    "push",
    "release",
    "create",
    "delete"
  ]
}'