Syncing with GitHub
One way to add User Journey scripts to Sematext is to do so directly, via the Sematext UI. You can simply type in the scripts or paste them in. Once they are in Sematext, you can also edit them at any point in time. Another way to get User Journey scripts into Sematext is by setting up synchronization with a GitHub repository where you have your scripts. This way you can manage them with GitHub, author and modify them with your preferred tools, benefit from version control, and automate their publishing to Sematext without doing any extra manual work, such as typing or pasting them in.
Setup GitHub Actions
To sync User Journey scripts, you will need to set up GitHub Actions in your GitHub repository. There are two available synchronization workflows. You can choose to use only one of them or you can use them both - they complement each other. The sync_updated_scripts.yml workflow detects updated script files and updates the scripts of the appropriate Browser Monitors in Sematext Cloud. The sync_added_scripts.yml workflow detects any added scripts and creates a new Browser Monitor for each script added to your repository. The workflows will be executed every time you push new commits or merge a PR to your default branch.
Keep in mind that:
-
These workflows don’t do anything with scripts you delete from your repository. In other words, if you delete a script from your repository the script will remain in Sematext Cloud until you explicitly remove it from there by yourself.
-
The sync is unidirectional - syncing is only done from GitHub to Sematext Cloud. This means that if you modify a User Journey script in Sematext Cloud, the changes will not be propagated to the GitHub repository. If you update the script in your repository then all the changes to that script that were made directly in Sematext Cloud will be overwritten.
To enable syncing of your User Journey scripts, you need to do the following:
-
Go to
https://github.com/{ORGANIZATION}/{YOUR_REPO_NAME}/settings/secrets/actionsand create two repository secrets:SC_API_KEYandSC_API_BASE_URL, as shown in the image below.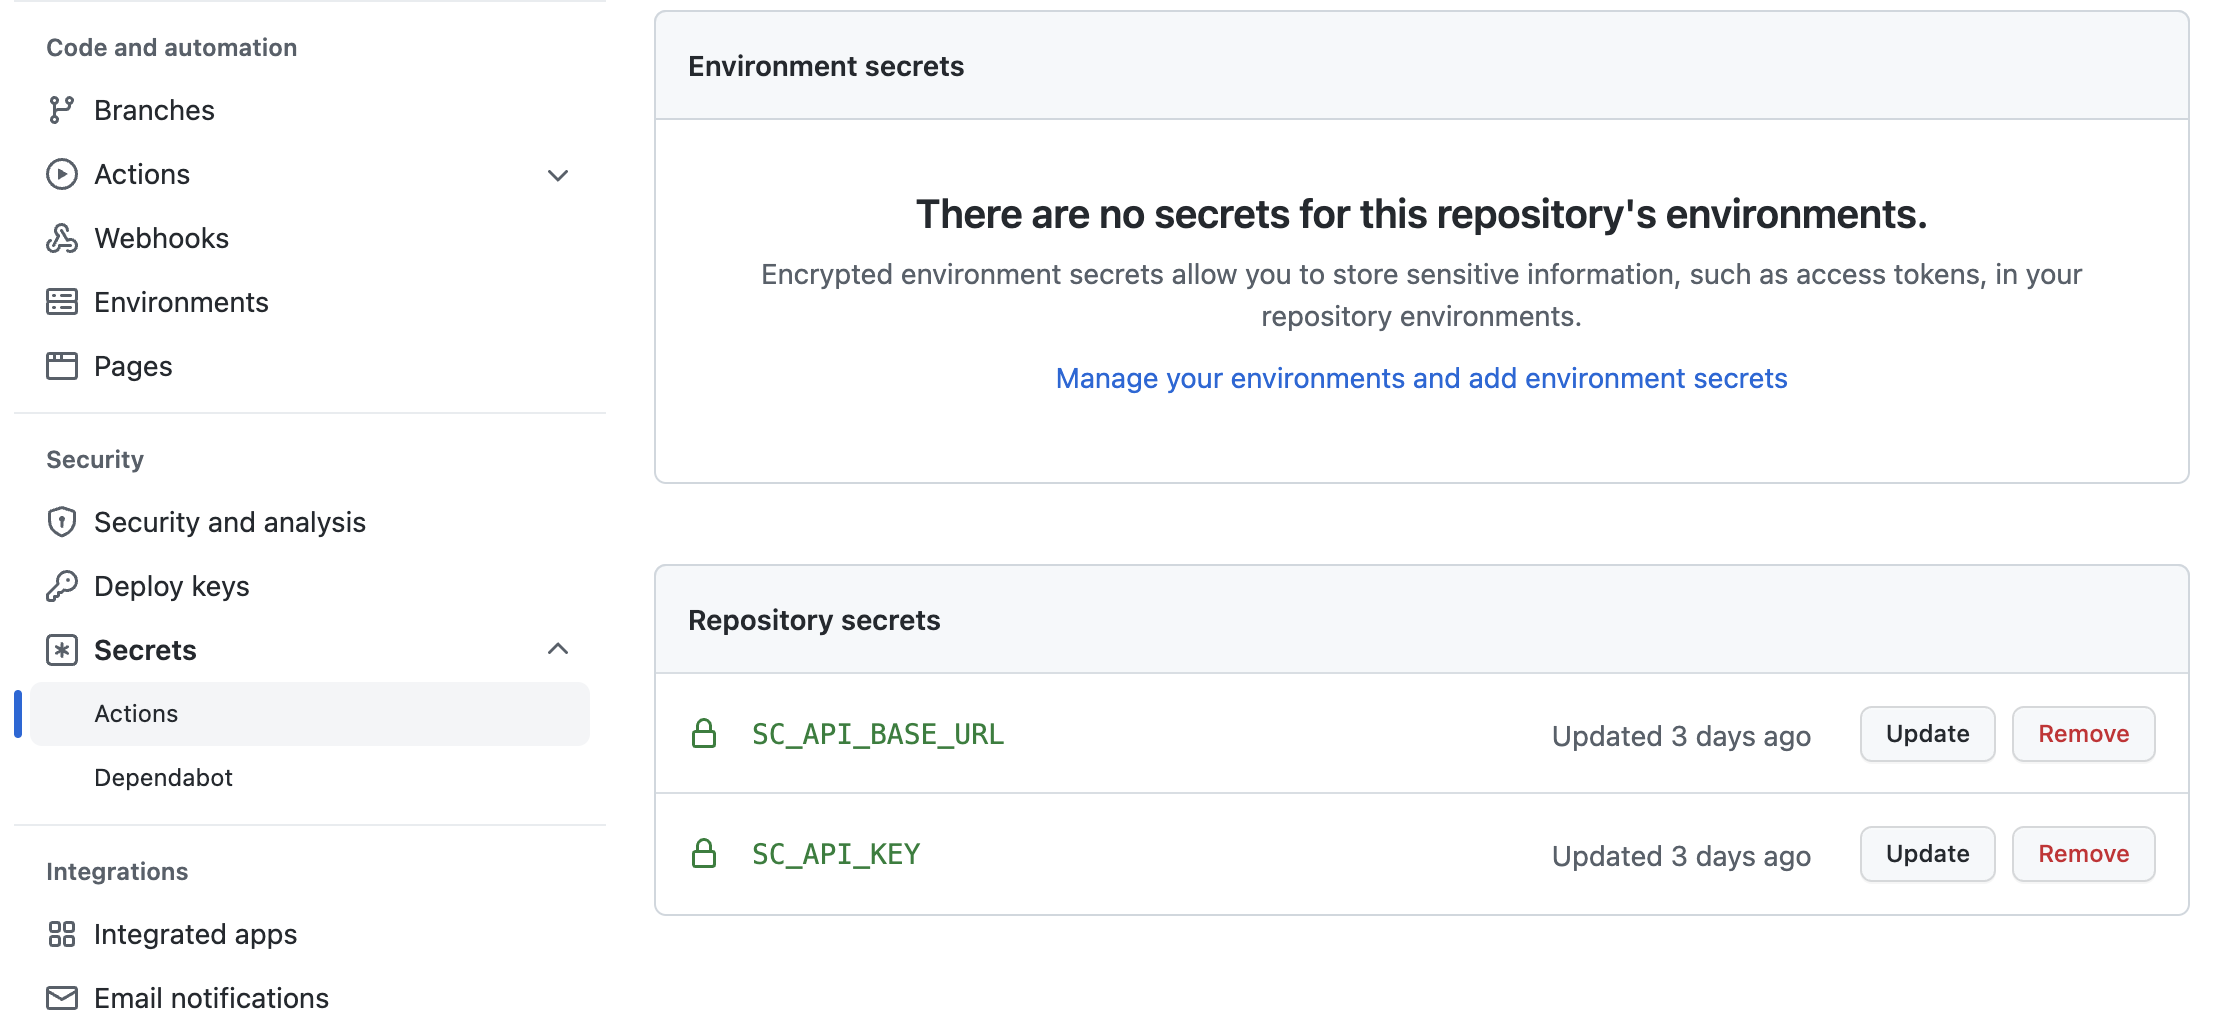
-
Add the
.github/workflowsdirectory inside the root directory of your repository and place thesync_updated_scripts.ymlandsync_added_scripts.ymlworkflow files inside the newly created directory. -
If your default branch is not
masteryou will need to update the workflows you just added with the name of your default branch. To set the name of your branch simply replacemasterwith your default branch name in the following code block, located at the start of both files:on: push: branches: - master
Prepare User Journey scripts
Now that you’ve configured the workflows, it’s time to prepare the User Journey scripts for syncing:
-
All scripts must be located in a directory named
browser_monitor_scripts. -
For existing Browser Monitors the first line of the script must contain a special comment with the Sematext App ID and monitor ID(s). That is how the workflows know which monitors need to be updated. The ID(s) can be found in the browser address bar when you open the details for the particular Browser Monitor in Sematext. The URL will be in the following format:
https://apps.eu.sematext.com/ui/synthetics/{appID}/monitors/{monitorID}.Here's an example://appId=398;monitorId=1238 or //appId=398;monitorId=1238,1240Any spaces are ignored, so feel free to add spaces for readability.
-
If you are adding a new script and want to automatically create a new Browser Monitor, the first line of the script must contain a special comment with only the App ID, like so:
//appId=398. If you are adding a new script and you specify monitor ID(s) as well then the corresponding monitor(s) will be updated with this script. The monitor will be created with the following values:- Monitor name = name of the script file
- Interval = 1h
- Location = N. Virginia
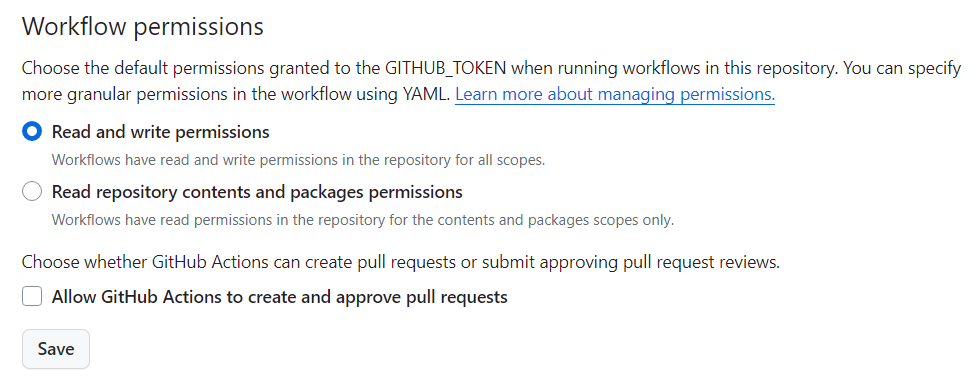
Note that after the new monitor gets automatically created from such a script the monitorID will be automatically added to the comment in the script. When that happens the author name displayed in the GitHub commit will be SematextSyncBot. In order for this to work, you will have to give the workflows permissions to edit files in the repository, which you can do by clicking on Settings in your repository, then clicking Actions -> General in the sidebar, which will take you to https://github.com/{ORGANIZATION}/{YOUR_REPO_NAME}/settings/actions. Scroll to the bottom of the page where the Workflow permissions section is located and make sure that the Read and write permissions option is checked, like in the screenshot below, then save your changes.
You also have the option to replace the default location for monitors which will be created through newly added scripts in your repository. This can be done by editing the sync_added_scripts.yml workflow file. Simply look for this line:
body='{"name":"'$name'","interval":"1h","locations":[1],"scriptBased":'$scriptBased',"enabled":'$enabled',"script":"'$script_content'","isGitHubSync":'$isGitHubSync'}'
Replace the 1 in "locations":[1] with the ID of the location of your choice. Consult the table below for a list of regions and their IDs.
| AMERICAS | EUROPE | ASIA PACIFIC |
|---|---|---|
| [1] N. Virginia, USA | [2] Ireland, Europe | [3] Mumbai, India |
| [8] N. California, USA | [6] Frankfurt, Germany | [4] Singapore |
| [7] São Paulo, Brazil | [5] Sydney, Australia |
For example, "locations":[2] will set the default location to Ireland. You can also provide multiple comma-separated IDs to use multiple locations for the monitors which are created this way: "locations":[6,8] would make all newly created monitors run from both Frankfurt and N. California.
This is also where you may replace 1h with another value you want to be used as the default monitor interval. The allowed values for the interval are 5m, 10m, 15m, 30m and 1h. Specifying any other value will cause the synchronization to fail.
Troubleshooting syncing issues
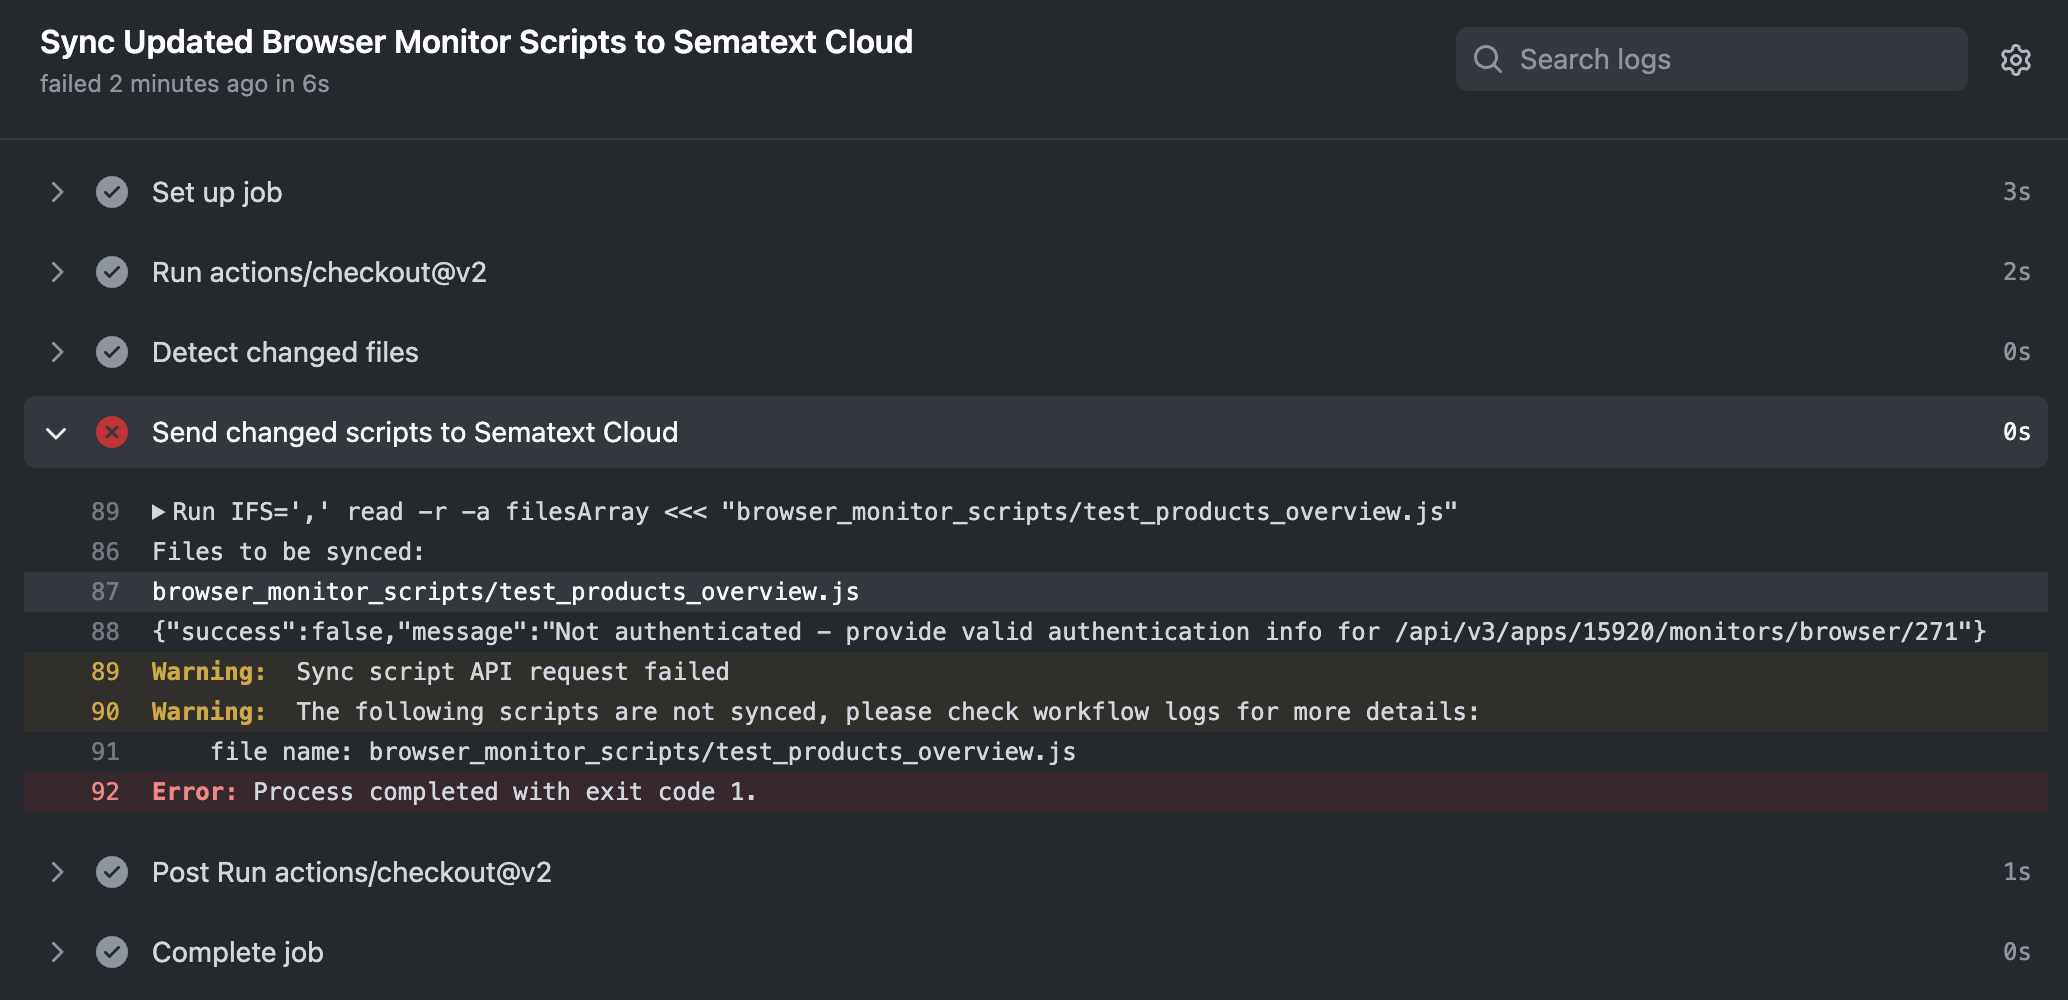
If your sync workflow run fails, you can see which step caused the failure and review the logs to troubleshoot. In the example below we can see which scripts weren't synced and why the sync failed (the API key was not provided).
You can learn more about monitoring and troubleshooting GitHub workflows here.
If either the SC_API_KEY or the SC_API_BASE_URL is incorrect, the synchronization will fail. The results of each workflow execution run can be found at https://github.com/{ORGANIZATION}/{REPO}/actions.
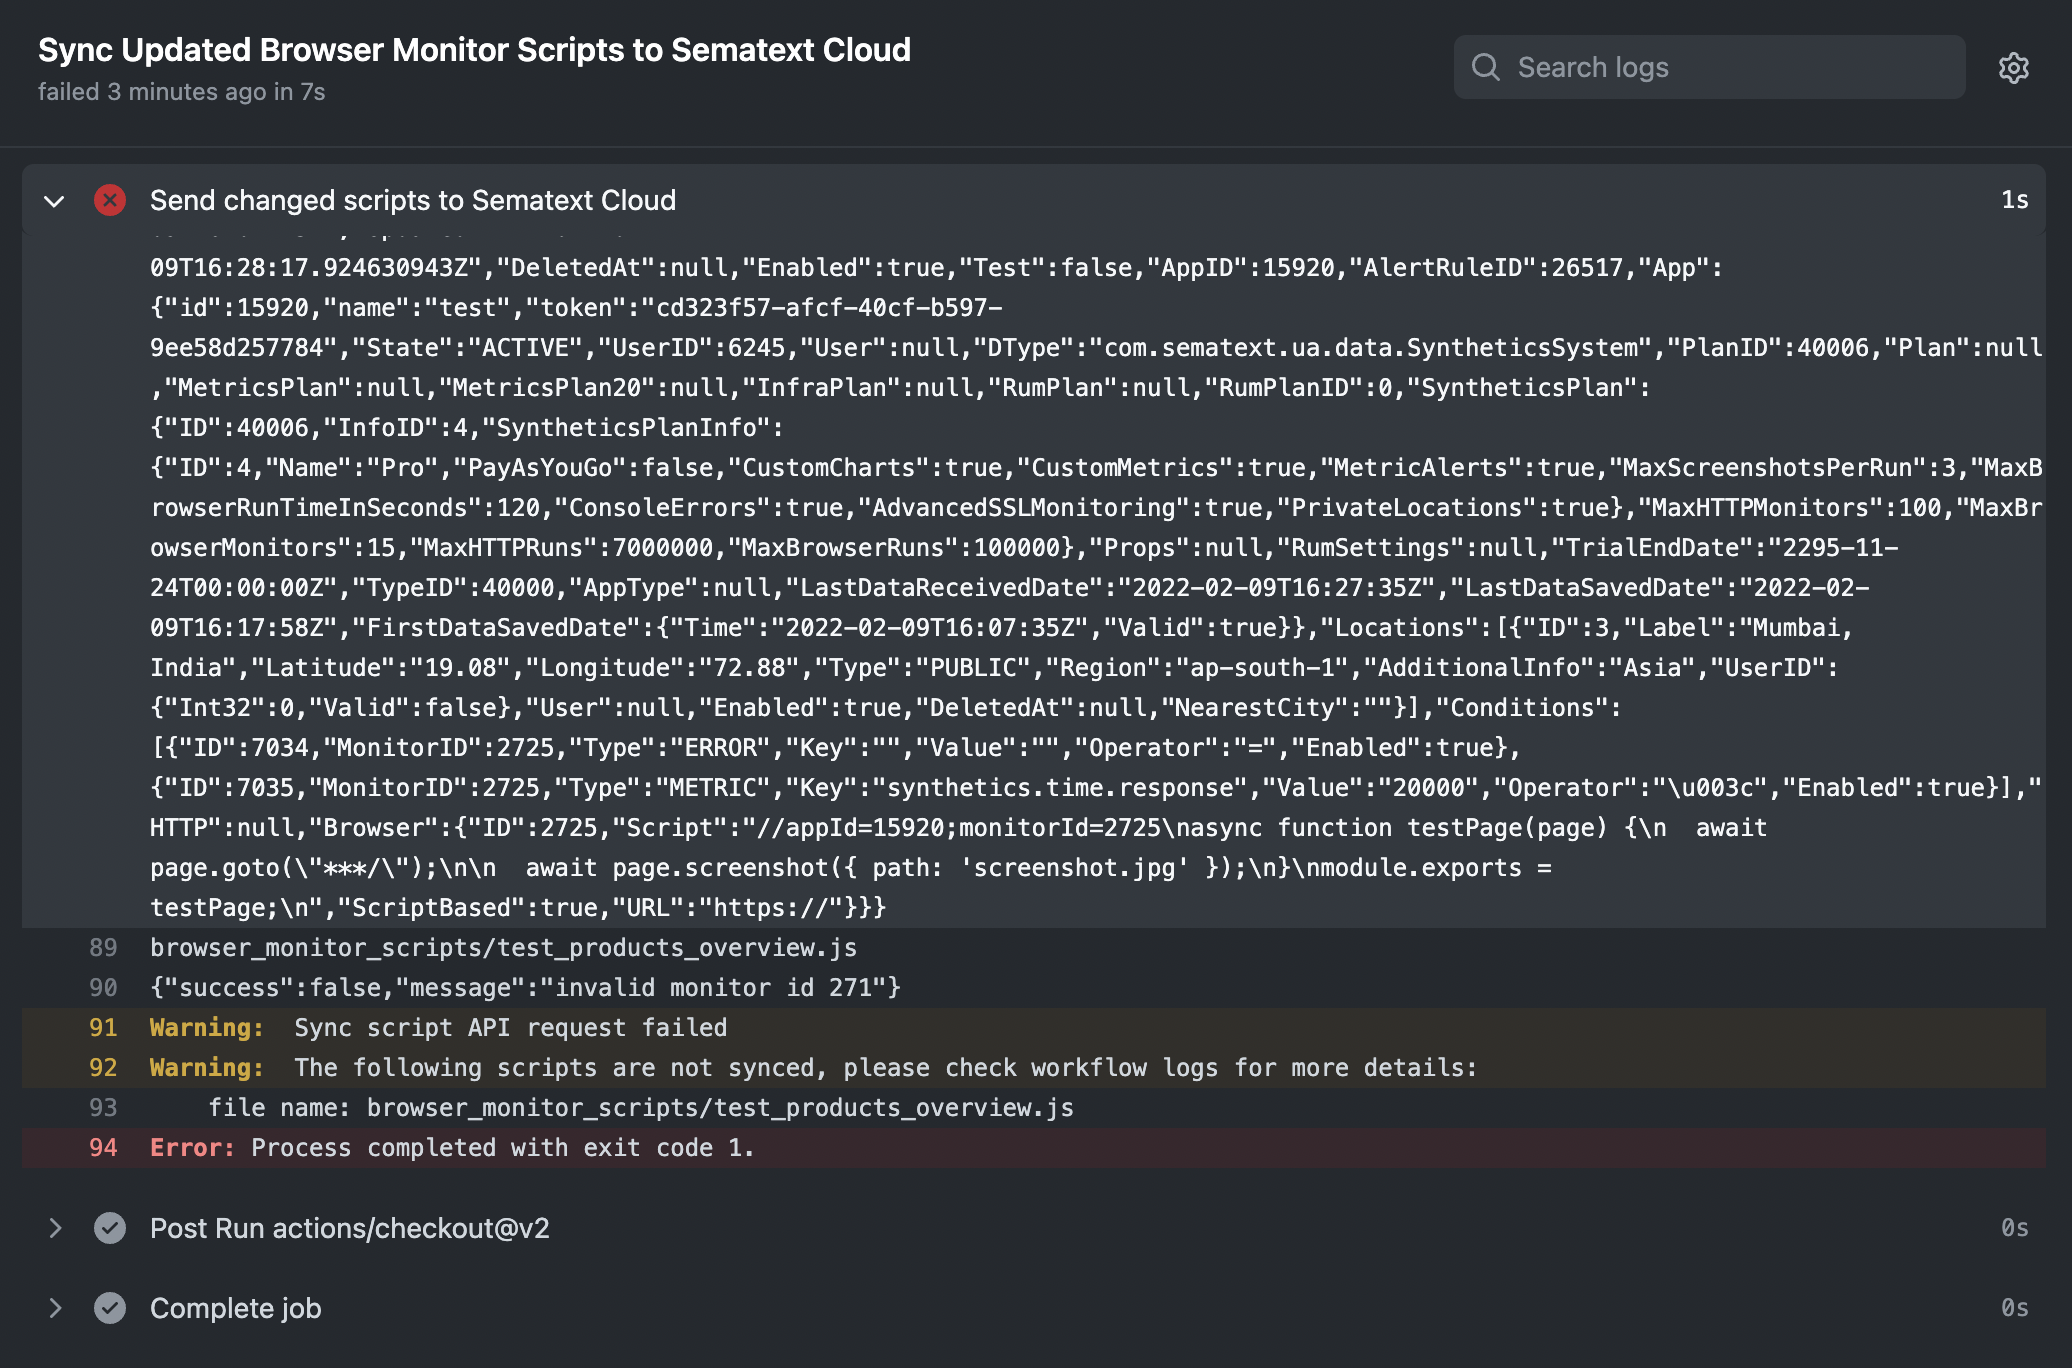
If either AppID or MonitorIDs is invalid the synchronization of the script with invalid IDs will fail.
When syncing multiple scripts only the script that contains invalid IDs will fail. The workflow run will be marked as failed even though some scripts were successfully synced, to raise awareness that some scripts weren't synced.
In the logs for that run there will be messages such as:
Warning: The following scripts are not synced, please check workflow logs for more details:
file name: browser_monitor_scripts/test_products_overview.js
The logs will also contain the Sematext API response indicating the sync failure reason: