Getting Started
Installing the Sematext MCP Server is fairly simple, with the setup varying based on which AI agent provider you use. This page contains guides on how to install it with various providers.
Getting your API Key
While the setup may vary based on which AI agent provider you're using, all of them will require your Sematext Cloud API Key in order to authenticate.
Your account's API Key can be found on the Settings → API page:
Setup guides
This section contains the setup guides for different agent providers.
Codex
Add the Sematext MCP Server to ~/.codex/config.toml:
[mcp_servers.sematext-cloud]
# For EU accounts, use https://mcp.eu.sematext.com/mcp
url = "https://mcp.sematext.com/mcp"
http_headers = { Authorization = "apiKey xxxx-xx-xx-xxxx" }
Replace the example API Key, save the file, and restart Codex. Run codex mcp list or type /mcp in the Codex CLI to check the connection.
Claude Code
Installing the Sematext MCP Server for Claude Code is super simple - it can be done with a single command! Just make sure to replace the apiKey here with your real API Key.
If your account is in the US region, run this command:
claude mcp add --transport http --scope user sematext-cloud https://mcp.sematext.com/mcp --header "Authorization: apiKey xxxx-xx-xx-xxxx"
If you're in EU, run this command instead:
claude mcp add --transport http --scope user sematext-cloud https://mcp.eu.sematext.com/mcp --header "Authorization: apiKey xxxx-xx-xx-xxxx"
Once you have installed the MCP Server, you can verify that it works with the following command:
The output should be this:
If you see any errors, please check that you have provided the correct API key.
Claude Web/Desktop
Claude uses the same UI for both its Web and Desktop apps, so the installation is the same.
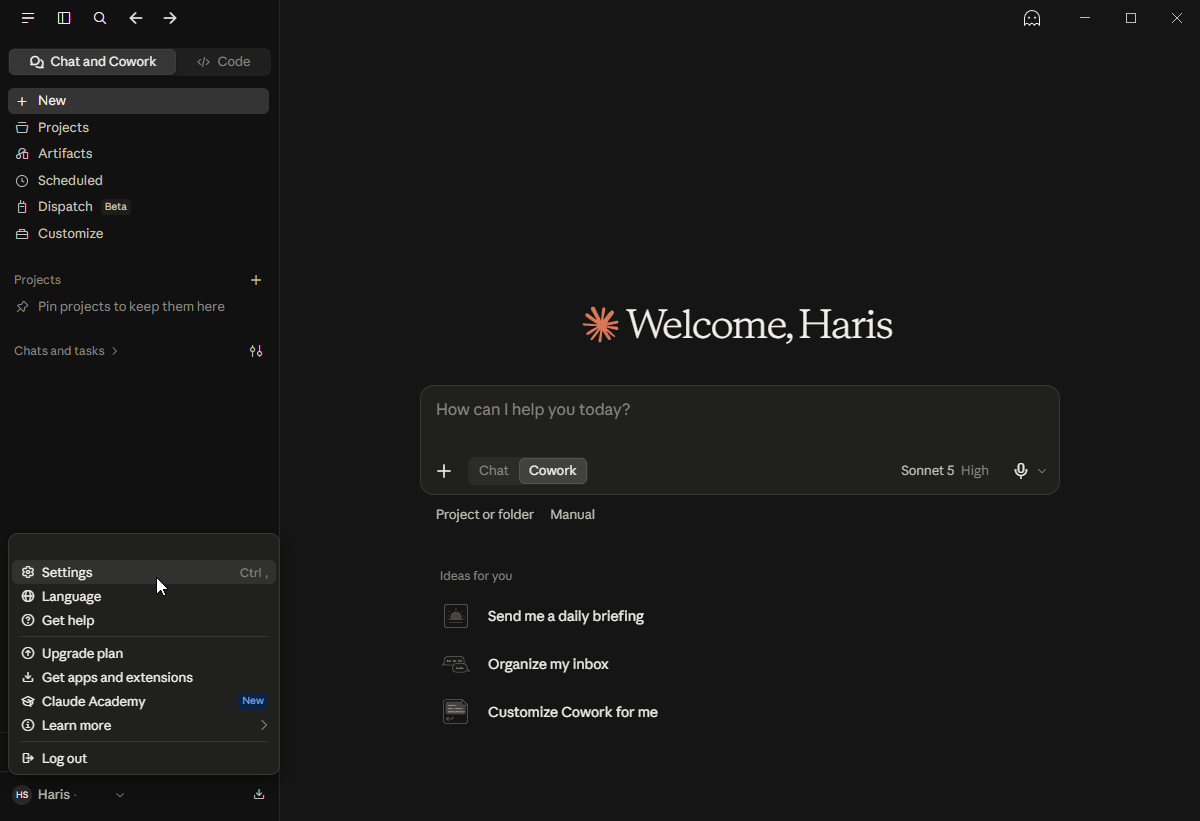
First, open the Settings screen by clicking your name in the bottom left and accessing it via the menu there.
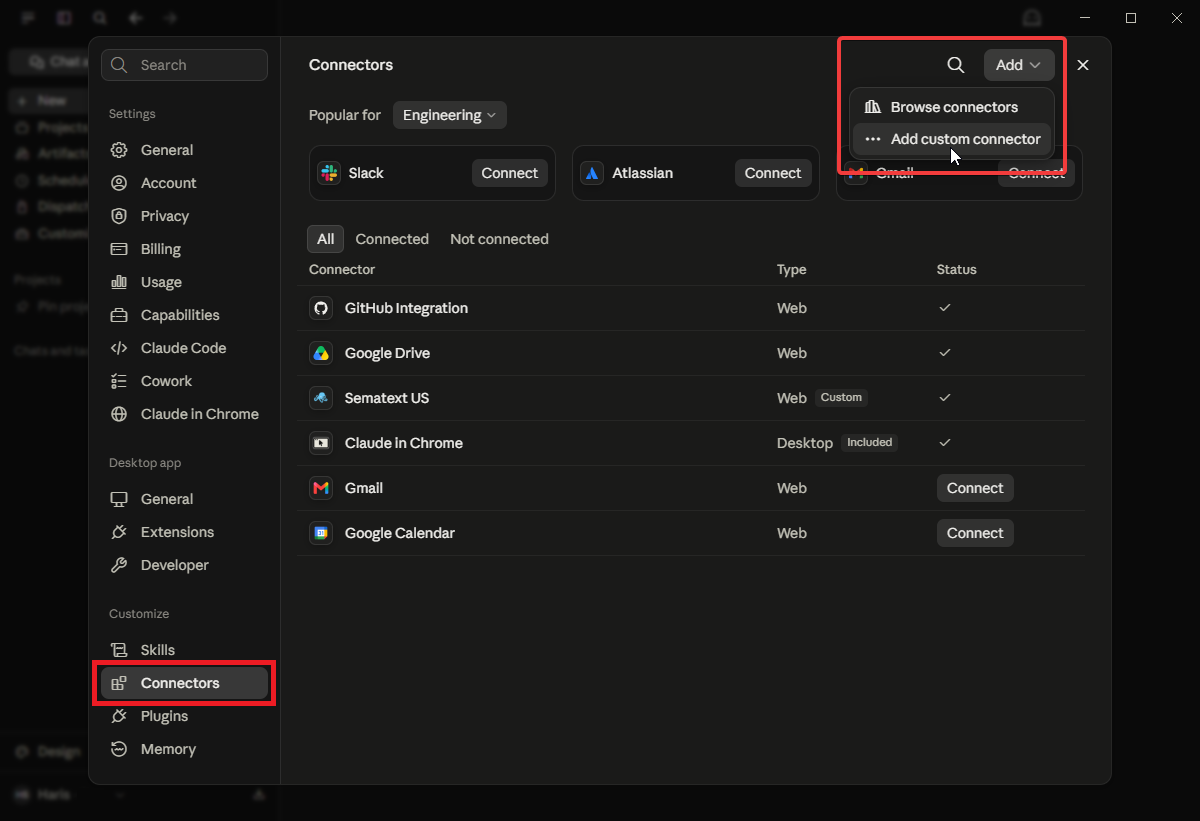
Next, click on Connectors at the bottom left sidebar. The Connectors screen will now show, with an Add in the top right. Click that, then then click Add custom connector.
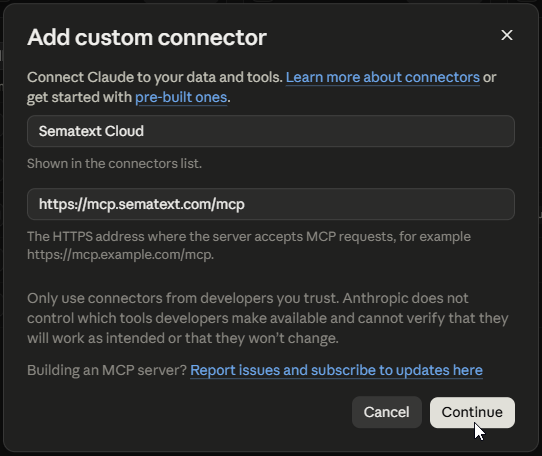
Fill in the basic info, specifying the MCP Server name and the URL depending on your region:
- For US: https://mcp.sematext.com/mcp
- For EU: https://mcp.eu.sematext.com/mcp
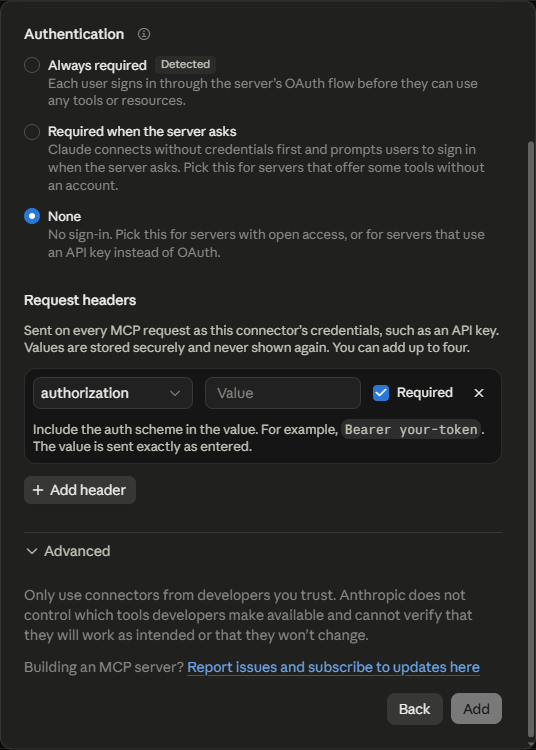
When prompted for the authentication type, select None, since you will use your Sematext Cloud API key to authenticate.
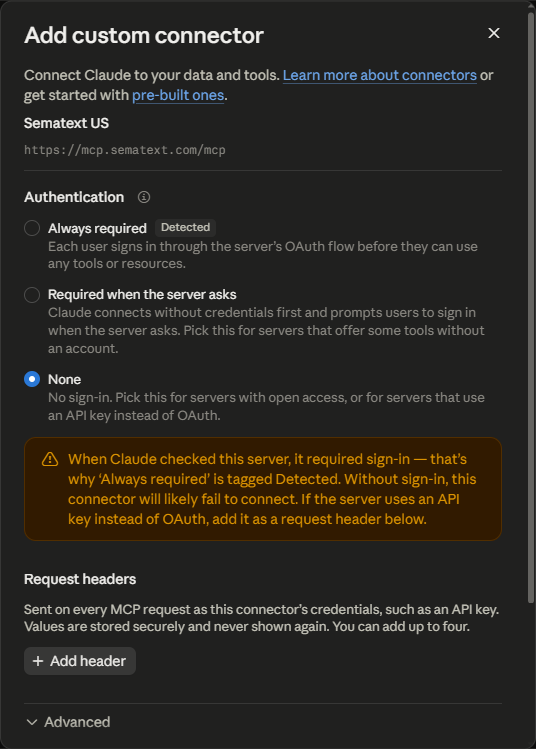
Copy your API key from your Sematext Cloud account, which you can find as described at the top of this page. The next step will ask for you to specify an authorization header, and its value will be apiKey YOUR_API_KEY_HERE.
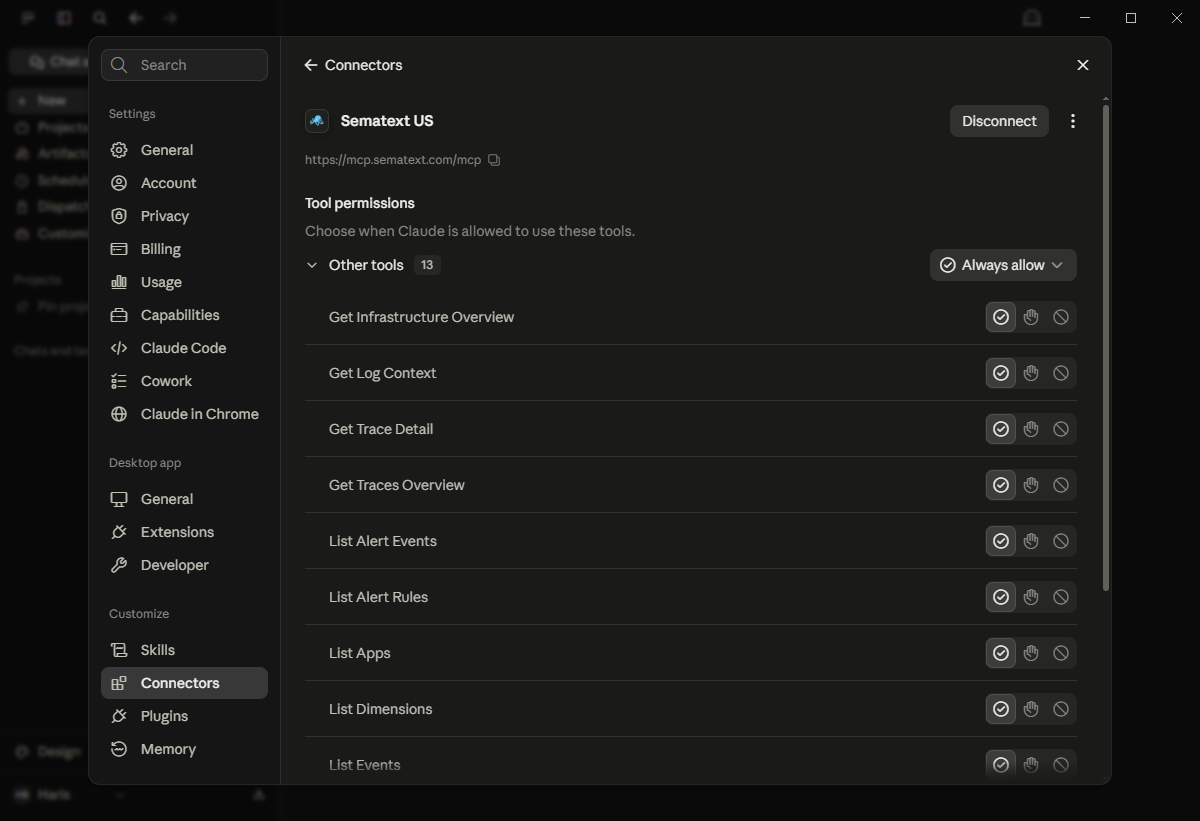
Click Add at the bottom of the connector creation screen and you should be greeted by the list of the MCP Server's tools. The setup is done!
OpenCode
Installing the Sematext MCP Server for OpenCode is simple, but requires a bit of tinkering in the OpenCode config file.
First, locate and open the opencode.json file that you use for OpenCode settings. On various Linux distributions (WSL included) it can be found either in ~/.config/opencode/opencode.json or ~/.opencode/opencode.json, if the current Linux user is the one who installed OpenCode.
Add the following content under the "mcp" block if your Sematext Cloud account is in the US region:
"sematext-cloud": {
  "type": "remote",
  "url": "https://mcp.sematext.com/mcp",
  "headers": {
    "Authorization": "apiKey xxxx-xx-xx-xxxx"
  }
}
Or this, if your Sematext Cloud account is in the EU region:
"sematext-cloud": {
  "type": "remote",
  "url": "https://mcp.eu.sematext.com/mcp",
  "headers": {
    "Authorization": "apiKey xxxx-xx-xx-xxxx"
  }
}
Saving the file and reloading/opening OpenCode should install the Sematext MCP server, so verify that it works with the following command:
The output should contain this message (example for a US account):
If you see any errors, please check that you provided the correct Sematext Cloud API key. If you did and there is still a failure connecting to an MCP server, there might be a misconfiguration issue or a bug regarding regarding the HTTP handler. So instead of the "remote MCP server type" instructions mentioned above, put the following content under your "mcp" block inside opencode.json file:
"sematext-cloud": {
  "type": "local",
  "command": ["npx", "-y", "mcp-remote",
      "https://mcp.sematext.com/mcp",
      "--transport", "http-only",
      "--header", "Authorization: apiKey xxxx-xx-xx-xxxx"
  ],
  "enabled": true
}
Note: In order for this "local MCP server type" approach to work with the Sematext MCP Server, your machine (under the user which is running OpenCode) should have nodejs and npx packages installed and accessible.
Visual Studio Code MCP servers
In order to use Sematext MCP Server via VS Code Chat interface (regardless of the AI model that is currently "powering" your VS Code panel), put the following content into the mcp.json file under the "servers" block that you created by following the official VS Code instructions (US account example):
"sematext-cloud": {
  "url": "https://mcp.sematext.com/mcp",
  "type": "http",
  "headers": {
    "Authorization": "apiKey xxxx-xx-xx-xxxx"
  }
}
If you are unsure which mcp.json file to use or you don't have any such file at all, follow these steps:
- In VS Code, open Command Pallete... (Under View tab in uppermost Action Bar)
- Type and select MCP: Add Server...
- Choose HTTP (HTTP or Server-Sent Events)
- For URL type the following, based on which region your Sematext Cloud account is on
- US region: https://mcp.sematext.com/mcp
- EU region: https://mcp.eu.sematext.com/mcp
- For MCP server label type sematext-cloud
- Choose Remote as a handler
By following these steps your VS Code will automatically open the generated mcp.json file for you. Make sure that the contents of that file look like this (URL depends on the region):
{
  "servers": {
    "sematext-cloud": {
      "url": "https://mcp.eu.sematext.com/mcp",
      "type": "http",
      "headers": {
        "Authorization": "apiKey xxxx-xx-xx-xxxx"
      }
    }
  },
  "inputs": []
}
Finally, start the MCP server. One way to do it is to click on "Start" option that is shown above the MCP server's name (in this case sematext-cloud) inside mcp.json file.
If you are presented with a pop-up message titled Dynamic Client Registration not supported, do not proceed or add OAuth client id information - select Cancel or press the ESC key. Instead, check if your mcp.json file content is actually saved and if you have provided the correct API key, then try starting the server again.